Saturday, December 30, 2006

This is the season


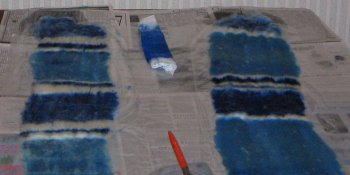
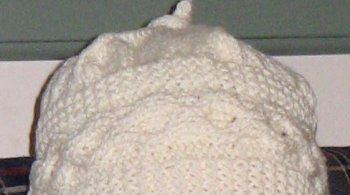
This is the season to work on all sorts of projects! These two displays are of fleeces that won prizes at a fair this year. The idea was to present an idea of the raw, washed, spun, and knit fleece. The pictures aren't great, put you can see some of the bits.

I didn't take a spinning wheel on vacation this year. I figured that if I really needed it I could borrow one. But I didn't. I finally picked up my Mom's old CD-drop spindle, added some fiber and spun. And it worked! I can now say I know how to drop spindle! And then, of course, I had to try and improve the spindle. The rubber had hardened and cracked, so it really *needed* to be fixed.... Ok, so perhaps I'm just a tinker-er searching for a project! At any rate, I made some salt dough and formed some whorls, used the dremel (spelling?) tool to get the center hole the right size, added some wood glue, and viola! New drop spindle!

The spindle, and a bit of roving, were left in my mom's capable hands. She showed me her first bit of yarn....about 2' of nice, thin, even spinning! Way to go, Mom!

Thursday, December 21, 2006

ColorSpots

I was giddy with success last night--one of my rovings sold within 24 hours of being in the shop! So I celebrated by trying some more dyeing techniques.

Most of these were vat dyed in my "for dyeing only" canning jars. I put about a cup of liquid in the bottom of the jar with the dye then added the wool. This sat for a few minutes, then I topped the jar off the water and steamed it.

I like the way the pink roving turned out. It reminds me of cotton candy!

Sunday, December 17, 2006

Somewhat Random Finished Objects


Remember these? As a girl my mom taught me to make these simple braided toys as gifts. Now my daughter is learning to make them. This one was mine (I had to see if I remembered all the steps to make them!).


And these are my almost perfect "Magic Stripes" socks. I checked my positioning in the repeats as I started, but I was off--perhaps by less than 12". Ahh, well. I was just glad to get them finished and washed, dried and in the mail. For the record, socks amaze me! The first sock took days, maybe even a full week or two. The second sock was done (start to finish) in two days! Deadlines help, but I still believe that second socks knit faster than firsts!

Sunday, December 10, 2006

Remember this?


I tried. I really tried.
But it didn't work.

The beautiful hot pink/variegated yarn will have to wait. I even tried knitting it into a hat, and that didn't work...yet! I may try a different pattern soon.


With a pair of helping hands, I re-wrapped the warp threads around the back beam. This time I carefully inserted stiff paper spacers. Do you remember all those times people have told you to use spacers to keep your tension even? Well, it's true! The tension was much more even with the paper wrapped in with the warp.


This time, I chose a 2/1 (or is it 1/2 ?) twill for the weaving structure, hoping to show off more of the warp threads. The twill weave worked ok. I was using the extra yellow shuttle to pick up the warp threads and make a shed for each pass of the weft. It wasn't so hard.

But, the purple weft looked grey against the colors in the warp and I didn't like it enough to continue for the 2 yards of warp.


So, on to other projects! The best part about this experiment was that the warp was never cut--this is a peg-type loom--so all I lost was some time, and I gained a better understanding of warp and weft color interactions! Hooray for experiments!

'Tis the Season

It's getting close to Christmas and little by little we are decorating the house and doing all the special Traditions that we've developed over the years.

This display is of interest, not because of the block pieces, but because the pieces look so good on my table runner! This runner was the first project woven on my loom.

The second piece, made from the same warp, resides on my husband's dresser. It's a looser weave that shows more of the warp colors.

This runner is tightly packed--pretty much weft faced. I didn't really like it, until just recently when I realized how nicely it's plainness shows off the colors of the nativity set, and how well it protects my end table against the extra bangs and scratches that come as my children stack the pieces up!

Wednesday, December 06, 2006

A little bit of this...

It all started out with wanting to do some dyeing the other night. So, I dyed. Then I dyed some more. And some more! The yarn is from a single roving wound into a ball and dyed in a ziplock bag. Blue dye was poured into one corner and heated. The excess dye liquid was poured off. Then magenta dye was poured into the other corner of the bag. The roving was steamed in the microwave to set the dye.


This roving was handpainted. I didn't have as much time to paint as I would have liked, so there is a lot of unpainted roving! However, the dye set well with a 30-40 minute steam session in the dyepot. (The last set I painted left my fingers blue after spinning.)


And this....well, this is about ready for the "frog pond" as they say in the knitting world! I'd like to be able to use this little loom to make a scarf or two, but this initial attempt isn't going to cut it. The tension across the warp is uneven. The weft looks ok in this picture, but it really hides the colors in the warp. So, attempt #1, farewell. We'll see what attempt #2 brings!

Sunday, December 03, 2006

Painting a Blue Sky Roving

This project started with a view of the winter sky:


I tried painting some rovings to reproduce the various intensities of blue:


And I learned a few things!
1) It's easy to put too much dye on the roving. I did let these rovings sit 10-15 minutes for the fibers to absorb the dye, but there was a lot of dye left to be absorbed by my blotters (see the roll of paper towels in the center of the above photo? The roving on the left has been blotted. The one on the right still needs blotting.)
2) The end results only vaguely resemble the painted roving. This may change with experience!
3) Painting rovings takes much more time than vat dyeing!

The final result:

The two rovings on the left are the ones I painted. The other four are different microwave dyeing experiments using the same dye.

The end results are cool--I think they'll spin up beautifully--but I'm not thrilled with either of the processes I tried! Good thing they're just experiments!

Saturday, December 02, 2006

Just for fun

This hat is patterned after one in "Yarns to Dye For". It is made in two steps. Step 1: on straight needles work the brim with cables in the center and garter stitch at each edge. Join the beginning and end to make a circle. Step 2: with circular needle or double points pick up stitches around one of the garter stitch edges of the circle. Knit a few rows, then decrease 6-8 stitches each round to make the top of the hat. I added an I-cord knot at the top of this hat. The large yarn and needles made the project go quickly, and it was the perfect "just for fun" project after a pair of lace socks!