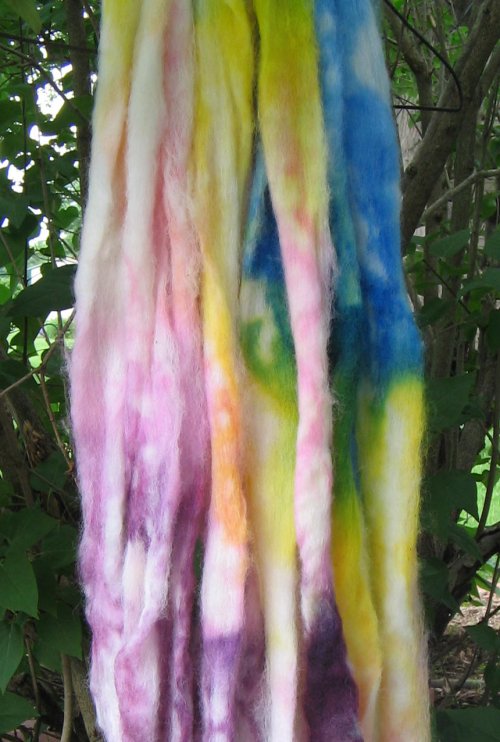
Showing posts with label dyeing. Show all posts

Friday, July 31, 2015

Lichen Dyeing

lichen


This is a summary of my first experiment with lichen dyes.  I scraped the lichen (a flat, blue-green lichen that is common on our maple trees here) off the wood with a knife, then let it soak in a 50:50 ammonia:water bath for 6 weeks.  I used a few tablespoons of the ammonia/lichen concentrate in ~2 cups of water to make a dye bath and inserted a mini-skein of border leicester wool yarn.


Dye on left, concentrate on right.  Dyed mini-skein on ball of un-dyed wool.


The result?  A very pale, unsatisfying yellow. The dyed mini-skein is on top of an un-dyed ball of the border leicester yarn in the picture.  The mini-skein did not take up much color.

Sunday, May 17, 2015

Natural Dyes--Rhubarb Roots

I've been working with plant materials as dye stuff.  My main resource is "Wild Color" by Jenny Dean.  It includes an reference for dyeing with the roots from the rhubarb plant.  My rhubarb plants went to seed last year and I have a number of unexpected new plants in the yard.  So, I decided to remove one older plant and experiment with it as a dye source.

Of course, I harvested the rhubarb first, and got rid of the leaves.  Then I dug up the roots, washed the dirt off them, and cut them into small pieces.  The roots were a strange texture--very spongy!  

The dye was prepared two different ways.  #1.the tea method.  Pour boiling water on the roots and let them steep overnight.  Use the liquid as the dye stuff.  After dyeing, dip in an acidic solution (vinegar works great).  The resulting color--pale yellow.  #2. the boil method.  Place the roots in a pot with water and boil them for 30-60 minutes.  Remove the roots and add wool fibers to the pot.  Return to a simmer and cook for about an hour.  Dip the fibers in a basic solution (ammonia) after dyeing, and the color turns a pale pink.

For both of these, I used approximately equal weight of fresh dye stuff to prepared wool fibers (Falkland wool roving).

Rhubarb roots and dyed Falkland wool.

Monday, November 03, 2014

Introduction to Immersion Dyeing

Linda Adamson at Tabby Tree Weaver hosted a class on Immersion Dyeing of Protein Fibers and I was the instructor!  Three students took the class and we were able to get lots of samples dyed--the first set showed depth of shade, or the range of color (light, medium, and dark), from a single dye color.  The second set of samples were color blends.  We started with yellow, magenta, and blue dye solutions and blended them to make new colors.  Jean Marie added drops of magenta and yellow to the blue to make a "smokey" blue.  Ellen added yellow to the blue in search of the perfect teal for her rugs.  Cindi mixed different amounts of the blue and magenta to make some lovely violets!  We ran out of time and didn't get to dye any of the fibers the students brought--it's amazing how fast time flies when you are busy! Thank you to all who came and dyed!  It's a wonderful, addictive fiber art!

Wednesday, May 01, 2013

Dandelion Dyeing


The dandelions are growing at my house.  Rather than going out and digging them all up, I tried my hand at a dyeing experiment.  Four ounces of wool, mordanted with alum and cream of tartar, then dyed with the liquid from boiling 9 ounces of dandelion flowers.  I was thrilled with the results!

 I have tried dyeing with dandelion flowers before.  A few years ago some neighbor boys picked a bucket full of flowers for me and I used them.  Unfortunately, I didn't use any mordant, and I don't think I weighed either the fibers or the amount of flowers...the result was terribly disappointing...almost no color at all from the flowers.

This time, I made use of Wild Color by Jenny Dean. She provides "recipes" that gave amounts of mordant per fiber weight and amounts of fresh dye stuff per fiber weight.  What a difference that made!  Hooray for wonderful resources!  Thank you Jenny Dean, and thank you beautiful dandelions!

Happy Dandelion Days!


Wednesday, June 27, 2012

Color and Dye Class with Robin Edmundson

Shetland wool
 Robin Edmundson gave a class on color theory and acid dyeing last weekend at St. Mary of the Wood's White Violet Center.    I had a great time!

My favorite part of the class is the way my brain started to reel as I tried to grasp some of Albert Munsell's color theory.  The main idea is to imagine a sphere with the named colors (red, yellow, green, etc.) running around the equator.  At the top of the sphere the colors fade to white.  At the bottom, they fade to black.  From the skin of the sphere towards the center line the colors loose intensity, fading to greys.  I got most of that.  It was when they skewed the sphere that my brain started to hurt! (At some point I'll get a copy of "The New Munsell Student Color Set" and work on that skewing some more!

In the mean time, I have been merrily cutting photos out of magazines and pasting them onto color scheme pages.  Deciding what to do with the color schemes and my dyes is yet to come!


Cascade 220--not quite cardboard-esq
 This skein of yarn (cascade 220) and the shetland roving above were both dyed with stripes of intense color unevenly mixed with stripes of less intense color.  I was aiming to reproduce the shadow effects in a photograph of a stack of corrugated cardboard.  Both dye jobs failed.  Drat!

The shetland is a very orange, almost coppery.  It's actually a pretty color and I like it...it's just not cardboard-esq.  The skein of yarn suffered from an overfull dye pot.  It had to sit on the counter for 30 minutes or more and the colors wicked at different rates, breakin the brown into yellows and greens. Dooh!  It's a great chromatography experiment and maybe a bit like camouflage, but not cardboard colored.  I'll have to try again later!
firestar


 Robin gave each of the students a few extras to play with.  This is some firestar, a nylon fiber that shimmers.  I dyed it with red, orange and yellow.  It's pretty!  I also have some nylon ribbon that I dyed in the same colorway.  Yum!
Mohair/acrylic blend


This was a test dye job.  I have some leftover cones of acrylic/mohair yarn.  I wanted to see if they would take the dye.  They did!  The yellow in the center of the photo is the original color of the yarn.  The orange/red is the dyed mohair.  The black...well, that's dye from the dark blue sample I was trying to overdye.  Now I know that I can dye the mohair blend...and I should not trust the dark blue dye!


gradient in blues and greens


This last skein, also Cascade 220, was dyed twice.  In class I used green and blue green, a bit of yellow and a touch of light blue.  I also intentionally kept a section of the skein undyed.  After it came out of the dye pot, it looked awful!  There was such contrast between the deep greens and blue-greens and the natural yarn!  Yuck!

When I got home I set up a sun dye pot and added some dilute "brillant blue" and black.  The result was a lovely dusty blue on the natural section of the skein which is significantly less jarring that the natural was!

What a fun and informative class!  Many thanks to Robin and the folks at the White Violet Center!

Monday, December 19, 2011

Evolutions


I came across these "evolutions" at Twisted Fiber Art's website the other day.  I love the transitions from one color to the next and I love how the overall color progresses without returning to the original color.  This particular colorway reminds me of the blue sky over sand hills.
I'm not sure how I want to use this ideas in my own dyeing.  I usually dye rovings (which Twisted Fiber Art will also dye into evolutions), but I'm not sure if I really need to put all those colors on the same roving to get this type of end result.  In theory, I could just spin light blue and then purple and then dark brown and then tan and then yellow without having to have dyed them together.

Sarracenia leucophylla hybrid (aka Pitcher Plant)
While I think about that, here is a photo from KathyW's Web Space.  Check out the color evolution/gradation in the flower petals!

Sunday, September 04, 2011

Dye Day

Here are my solar dye pots on the front walk to my home. The weather has been hot (90 F) and sunny. Perfect for dyeing.

The colors are turkey red, black, yellow, two little pots of greens, brillant blue, and a big pot of green.

And, just so I remember, this dyeing day was the day we took our Heart Kitty to the shelter to be put down. He was not well, but it's still hard to let him go.

Friday, May 27, 2011

Dye Discharge


I saw some beautiful scarves last week that had been woven from a warp dipped in bleach. It lead to some experiments here at home to see if I could do some dye discharge with a cone of cotton yarn.

And the results are in.

Bleach, followed with a peroxide bath to neutralize the process, works great at removing the "mint" green dye from this yarn.

From left to right across the page the samples are:
(1) soaked in water --this was my standard. Soaking it in water let me know that the dye didn't bleed.

(2) soaked in a 50/50 bleach/water solution.
(3) soaked in a 75/25 bleach/water solution.
(4) soaked in a cream of tartar solution. This idea came up at our guild meeting. I used 1 tsp of cream of tartar in 120 mL of water.
(5) soaked in 3% hydrogen peroxide.

The only changes to the color were seen in the samples that were in the bleach. There was no perceptible difference in effectiveness between the two bleach solutions.

A note about neutralizing: While searching for information on dye discharging, I came across Paula Burch's site "All About Hand Dyeing". She has lots of great information there, including a bit about neutralizing bleach. From what Paula presents, bleach does not stop chewing on the textile with a water rinse. It needs something to stop the reaction. Hence the neutralizing dip in the hydrogen peroxide. I haven't done enough with bleach and textiles to know how critical it is to do this step. But, I don't want my textiles falling apart on me either!

Tuesday, February 15, 2011

Updates


From the loom: "sunburst" in 20/2 tencel (warp & weft), 45 epi. I love how this is weaving! I wrote out the threading by shaft number because my printout was too small to easily read. I've been using for my treadling sequence too --held to my floor lamp by a magnet! The design is from Twill Thrills p.56.


From the dye pot: This is Romney wool roving dyed "dusty rose". It is a beautiful color, one of my favorites! The roving was only briefly wet prior to entering the dye pot and irregular dye take-up resulted. I've separated the roving into dark, medium, and light bundles and am aiming to spin a variegated yarn--dark at one end, light at the other.


The first two colors (dark on top, medium on bottom) have been spun. Light is next.


And from the sewing room: This is my latest project--a duct tape dress form. I have high hopes of sewing with my handwoven cloth. I also happen to have huge fears and feelings of inadequacy about my ability to turn cloth into clothing for myself. I believe in conquering fears by working on the underlying skills needed...so I read & skimmed Warch's "Illustrated Guide to Sewing" yesterday afternoon. The book belonged to my grandmother who was an amazing woman and could work some amazing tricks with cloth. Then I stumbled upon "Vintage Sewing Info" and read "Modern Pattern Design" by Pepin (c. circa 1942).

The two things combined made it clear that I need to experiment with line and drape...and it would be great if I could do this at small scale. (Warch encourages the creation of a mini-dress to practice skills without using great expanses of cloth.)

The duct tape dress form was made following the directions here. Basically, plastic bags were worn like a dress and layers of duct tape were carefully placed over that. It took almost two hours, start to finish, for the taping. It took less than two rolls of 60 yd heavy-duty duct tape. Right now it is hanging on a hanger with a padded cardboard insert across the shoulders. I would like to put it on a stand, but this works for now.

The next thing I would like to do is make a miniature version of this dress form. I'm thinking that 1/4 scale would be good (~16" doll size). I found a site that makes dress forms for dolls. I'd love to have one like that for me! If nothing else, I'll be taking measurements from my duct tape form and approximating "my" shape in a smaller size.

Then I'll begin to play around with some of the clothing designs in some of my "clothes for weavers to make" books.

Thursday, February 03, 2011

Dyeing on Snow Days

This is what I do on snow days.


8+ ounces of olive green roving


8+ ounces of what I'm calling "candy apple" red.


A series of blue roving. The dark ones were the first in and out of the dye pot. The light blues were an attempt to make use of the leftover dye in the pot after the dark set came out.


And, this photo is the recycled chenille scarf. :)

--We got 1" of pellet ice by Tuesday morning. We had another 2-3" of pellet ice and snow by Wednesday afternoon. We never lost power--and I am so grateful for that! I couldn't have dyed so much without running water and heat!

Monday, June 28, 2010

Dyeing with Freinds

My friend Ellen came by to spend an afternoon dyeing with me. (Doesn't that just sound....strange...getting together to die/dye.) But we did! It was Ellen's first dyeing experience, and it was fun to have her here.

This pink boucle yarn was our test piece. We were unsure of the fiber content and wanted to see how well the different parts of the yarn would take the dye. Both the thick/thin and the binder yarns took dye beautifully!


Here's my handpainted skein. It's a wool/silk blend that started off as white. I'm not sure how I will use it, but I like the colors (dusty rose & olive drab).


And here's a shot of the dye pot after we had pulled out Ellen's skeins. Mums the word on the color that we chose to dye...but the yarns looked gorgeous coming out of the dye pot!

These were acid dyes on wool/silk and wool/?? and mohair.

:) I love dyeing!

Tuesday, June 08, 2010

Acid Dyes on Wool

Oh, I'm a happy camper! I have two stacks of beautiful rovings! This was my first opportunity to dye after taking a class with Rita Petteys (see my previous post on the class).

These are wool rovings-one coopworth and one Romney. The dyes are acid dyes from Pro Chemical.

The rovings were soaked in warm water and vinegar for 30 minutes, then the water was spun out (hooray for my salad spinner!) and the wool was laid on plastic wrap on my table.

The dyes were all in squirt bottles and I squirted them in bands across the wool.

After putting a top layer of plastic wrap on the wool, I used my hands to smoosh (technical term!) the dye into the wool.

The wool/plastic sandwiches were rolled into bundles and steamed for 30 minutes.

:)

I think they are super pretty!!

Saturday, May 22, 2010

Handspun, Handwoven

Here at my house we are each allowed a handful of fetishes or quirks. I'm working on a series of projects to try and overcome one of my fears/fetishes.

I spin yarn. I want to weave with yarn that I spin. I_am_afraid of working with my handspun yarn.

Why am I afraid of it? What do I think will happen with it or to it? I don't know. That's why it falls in the fetish/quirk category.

But, I am a brave girl! I can overcome my fears of using my handspun yarn.

I've put together a couple of different bits of handspun yarn with the intention of making samples. Really, just samples. These projects serve no purpose, except the one to help me overcome my fears!


This warp is a two-ply yarn, probably a Romney wool, handdyed with dandelions. I sett it at 12 ends per inch, threaded in a straight twill, and wove a pattern from Strickler's Patterns for 8 harness weaving. The weft is a handdyed, handspun single.


When the handspun single weft ran out, I shifted to some other handspun yarns and plain weave. The red is a dyed two ply, probably cotswold wool, and the brown is a natural brown wool single.


Would you like to know what happened when I wove with my handspun yarns? Did they explode? Pull apart? Make strange lumpy, bumpy fabric? Nope. The yarns behaved like....well, like yarns!

Go figure! Maybe there is hope for this fetish of mine!

Sunday, May 09, 2010

Dye Class with Rita Petteys

Linda Adamson of Tabby Tree Weaver in Arcadia hosted a beginning dye class with Rita Petteys of "Yarn Hollow" . The class was fun! Rita covered immersion dyeing and handpainting of protein yarn and fibers with washfast acid dyes.

The best part about the class (aside from some of the cool tips and tricks Rita taught us) was getting to play with color! There was a box with perhaps 100 dye powders (don't trust my numbers here...I didn't really count, it just seemed like tons of color to a girl who owns three (count them, three) jars of dye!) and the same number of quart jars of dye solutions--all ready to be used!

We were given some instruction on making dye solutions, given the opportunity to practice, and then set loose. If we finished a dye solution we were to refill the jar, but we could use any and all colors we desired.

Wow!

My pictures are of three of the five projects I did. The first was a solid red, immersion dye on DK weight yarn. The second was a handpainted lace weight skein....and I left it in the shop! Dooh! (Linda has kindly offered to bring it to our next guild meeting so I can bring it home! :)

At the top is a falkland wool roving that I dyed with yellow, blue and a darker blue/black.


Next is some of my Romney roving that I squirted with orange, then added an olive green and a diluted leaf green.


And lastly, here is a sample knit piece that I dyed and will unravel and re-knit.

Rita has a nice post on sockblanks on her blog. I think I may need to go through this exercise myself to see how dye patterns on the blank translate into knitting.

It was a great day! Thanks to Rita, to Linda A., and to a fun bunch of classmates!

Tuesday, April 06, 2010

Two Dye Jobs


I'm playing with dyes again. I used to do a fair bit of dyeing and would sell my dyed rovings on ebay. Then I hit a bad spell where most of the things I dyed felted...either that or they just looked awful!

So, after taking a break, I'm at it again! Pictured here are two variations on the same theme dyed with acid dyes. The outer two rovings are the initial dye job, and I felt that they were too pale. The inner two rovings are a repeat with 3x the amount of dye. Definitely more color there...I'm not sure about beauty!

It's time to take a dye class!

Tuesday, June 23, 2009

Dye Strike

Kathleen Taylor's "Yarns to Dye For" has some interesting methods for dyeing variegated yarns. I tried one last night. It didn't turn out quite as expected!

The dye was an acid dye (for protein fibers) and was a mixed color--blue dye and yellow dye mixed to give a deep bluegreen.

The method: wind your yarn in a loose (oops. Mine wasn't loose!) ball and immerse in dye bath. Every few minutes, pull out a few yards of yarn.

The result: My handspun wool yarn is now a beautiful robin's egg blue. It has subtle shading, but no overall variegation. (The idea is that the end that is pulled out of the dye bath first is pale and the end that is pulled out last is very dark.) Also, the blue dye obviously struck first--I added some rovings after the yarn was out of the dye bath and they are more green.

An interesting note: one of the rovings I added was a natural brown. It successfully picked up dye, so I know it can be overdyed. Unfortunately, bluegreen dye on brown looks sickly...it's a very creepy, witchy color to me! The photo below is out of focus but you can see some of the blue in the brown. What you can't see is the green that is also there! Eww!

I think I'll keep that one and see if it doesn't find a use around Halloween time!

Tuesday, March 10, 2009

I Dyed

Oh, happy day! The school age kids are all well and back in school, the three year old was content to play, and I dyed.

And dyed.

And dyed.

I'm dead (tired, that is!)!

Today's techniques included vat dyeing (over half a pound of beautiful sunshine yellow!), over dyeing (the little bit of yellow and orange next to the yellow), crock pot dyeing (the blues & greens), and painting (the pink/purple combo).

Lessons learned? Hmm. Steaming cheap plastic wrapped wool in the oven melts the plastic wrap. I think I got it all off! Dooh! A dunk in the big pot and a chance to simmer helped even out the color from this particular crock pot batch. And, vat dyeing does a great job of completely dyeing the wool!

Dye Days are great!

Wednesday, January 28, 2009

Dye Challenge

My cousin inadvertently gave me a challenge. She sent me a link to a professional dyer's page and asked if I could reproduce two colorways.

The short answer is: probably not.
The medium answer is: I've never tried.
The longer answer is: Let me Dye!

The orange/yellow/pink roving was dyed in a crockpot. The blue/green/purple was oven dyed.


Neither of them turned out like the photos I was sent....but they both look interesting to me! They both need to dry, and then they will find their way to my etsy shop (fibertwist.etsy.com).

Friday, October 10, 2008

Purple People

The "Very Berry" sweater for my daughter is done. Whew.

This sweater has been challenging, but not necessarily in the knitting aspects! I did modify the pattern, knitting the sleeves flat and not in the round. It's just been hard to force myself to sit and knit instead of spinning and/or weaving. That and it's been hard to get my daughter and the sweater in the same room long enough to check the size!


I (miraculously!) got her to try on the sweater a second time today before grafting the underarms. After knitting the neck and watching it flop over (ARGH!) I was about ready to rip the whole thing! But the curly neck lay flat on the body! Go figure!...and, Hooray! Now the sweater is done, and it's time for more weaving!


I have been dyeing cotton with Dylon's "Permanent Dyes"--which I think are a direct dye. Earlier in the week I did a blue batch. Yesterday I dyed purple. Three of the skeins are 20/2 cotton (originally a very pale, mint green), the fourth skein is 10/2 cotton, originally a tweedy grey. The bottom pile is cotton fibers to card and spin.

Sunday, February 03, 2008

A little bit Backwards

Typically when I put a warp on the loom I include extra yardage for sampling. With this dark purple handspun (Look, Dorothy! I'm using that handspun as a 2-ply! It's holding up great!) I did my sampling on day one. I didn't like the color choice (it was a bright white yarn), so on day two I un-wove the sampler and began weaving with this purple yarn left over from my daughter's sweater vest. The variegated purple weft looked so nice with the dark purple warp! I was thrilled! I was excited! I wove a 50" scarf in plain weave.

And then I sampled some other weave structures.

How backwards was that!?!

The plainweave was nice, but this 2/2 twill zigzag is so much better that on day three I un-wove the entire plainweave scarf and started over. This time I sampled the 2/2 twill, a block weave pattern and a few two shuttle color options, before deciding that I liked the twill best. Whew.

But the backwards saga doesn't end there. I am running out of yarn. I debated just weaving a short scarf, but that didn't fly. So, I ended up dyeing a new batch of roving in a similar colorway, spinning like a mad woman yesterday, so some of the yarn will be dry for use tomorrow!

The extra yarn gets to be used in a coordinating hat and mittens.

Roving to be spun.


The already spun and drying yarn.